
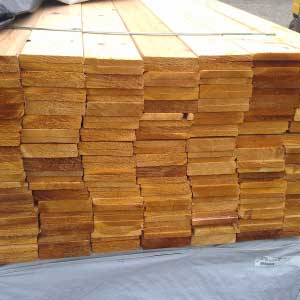
Cedar shake sidings do improve the overall look of the home, it makes the home look very attractive. That is because cedarwood itself is a beautiful looking wood.
However, they are costly as well. But the look and reliability this wood offers, that easily outweighs the price.
Not only that wood but the installation cost is also little high. But you can save installation cost if you do it all by yourself.
Don’t worry you have never done it before. Installing cedar shake siding is not at hard as you might be thinking. With the right instruction, anyone can do it well.
In this guide, I am going to show how to install cedar shake siding. I tried my best to keep this as understandable as possible.
Have a look!
How to Install Cedar Shake Siding
Tools you will be needing:
- A Circular Saw
- Measuring tape
- Hammer or staple gun
- Chalk line
- Block plane
- Surform Tool
- Drill
- Story pole
- Flat pry bar
- Ladder
- Level
- T-bevel
- Utility knife
- Tin Snips
- Caulking gun
Materials that are needed:
- Cedarwood trim
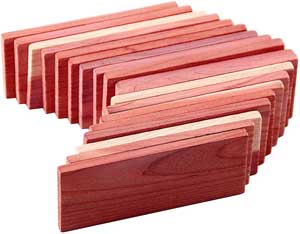
- Wood shingles
- Paint and primer or sealer
- Caulk
- Stainless steel nails or staples
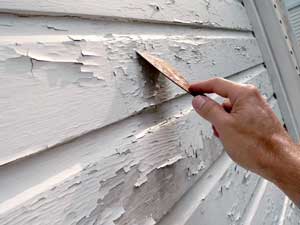
Doing Inspection
If you have existing siding then you won’t need to remove that. Adding new siding over that would give great noise insulation and climate insulation.
That being said, you will have to inspect each of those wood closely. If you see any bumps or any uneven surface, or cracks, you will have to treat that immediately.
Before you install the new sidings, make sure to smoothen those bumps or uneven woods.
And check if the sidings have insulation under them, if there isn’t any then remove them and add insulation, and then install new sidings.
Measure and Cut
Take the measurement and cut the woods into that exact size. Measure a couple of times to ensure, if you cut the woods short then that will be a waste which you definitely don’t want.
The right measurement will allow you to install the sidings well. The woods will fit nice and tight.
Prepare the wall for sidings
For this, you will want to use building wrap in order to add water-resistant protection under the singles. You can use self-adhesive flashing tape to the corners of the wall and around the door and windows.
Attach Trim
Then you will want to add exterior trim around the doors and windows. Make sure you pick a wood material, stain, and things like that which will complement the new shingle sidings.
On the other hand, you will need to install outside corner trim as well but if you have the intention to weave the outside corner shingles then you won’t need to do corner trim.
Laying out courses
Take the story pole to layout the courses which will help you to not use narrow pieces below or above the doors and windows. In order to get the right alignment, you can lower or raise the bottom course.
Or you can use the swing stick method as well to gain a layout that is consistent. And then you would want to mark all the layouts around the home.
Trim the corner
Now attach the corner trip pieces. Through corners, trims shouldn’t be much visible but they need to be wise enough so that they can provide room for caulking when the shingles are attached.
However, 1×1 board taken from 5/4 cedar decking is usually the ideal size, try best to use this size. It will be able to hold up many layers so that the trim becomes thick.
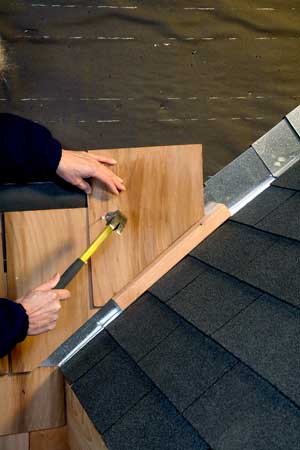
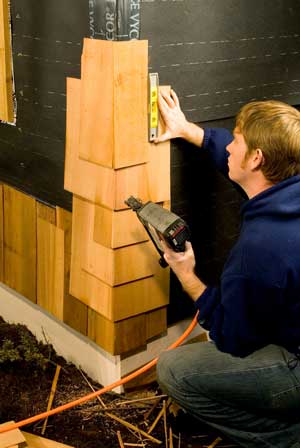
Installation on corners
Attach the very first starter course piece at the corner, make sure it runs past the corner by around 1-inch.
Get the help of a small level to hold the course plumb and attach two nails or staples, make sure they are attached strongly. For the starter course, you can use low-grade shingles which cost less.
Keep installing courses on the corners and use a utility knife to cut down the edges. And then you would want to do a little touch-up with shingle to get a smoother edge. You can use a small block plane to trim the shingle edge.
Installing the second layer
Starter course shingles are made of 2 layers. You will have to attach the second layer in a way so that it is offset from the underlying layer for at least 1-inch.
For attaching you can use hand nails but I would recommend you to use a stapler or a pneumatic nailer.
The reason is hand nailing can cause the shingle to split which wouldn’t be the case if you use a stapler or pneumatic nailer.
Work on the windows and doors
You will want to keep installing the shingle siding around the doors and windows. You would want to install wide notch cut shingles so that the corners will be accommodated. The shingle joints should be closer than 1-inch.
Place for the hose
If the wall has a pipeline that you use with a hose to water your harden or to clean the outside area or whatever, you will have to attach siding according to that.
What you want to do is take the measurement of the pipe and then make a hole into the shingle that is ¼-inch bigger than the measurement. The reason why you should make the hole bigger is that the shingle will be safe from condensation.
Start from the Bottom
Start attaching the wood from the bottom. Put the wood shingle and secure the left side. Use a nail gun and put a single nail on the left side of the shingle and then align the wood.
Make sure you align properly, there shouldn’t be any ups and downs. You can use tape or chalk to get the right alignment. And then keep going up until you cover the entire wall successfully.
Conclusion
I know it is hard to install sidings but if you learn to do it by yourself you can save a lot of money for sure.
And on top of everything, you will know exactly what you want and you would install the siding according to your desire. I hope this guide has given you a basic idea of how to install cedar shake siding.