You are here that clearly means you want to learn how to stain cedar woods. And this guide isn’t going to be a disappointment for sure.
Staining cedarwood isn’t a tough job at all. Gather the right equipment and have little knowledge of wood staining and you are there!
For outdoor cedar woods, staining and sealing are a must, otherwise, the wood will get damaged in no time. So it is better that you learn how to do those, it will come in handy at the right time.
However, in this very guide, I am going to instruct you so that you can get the staining done properly.
Make sure to focus and do not miss any part at all.
Let’s get started then!
How to Stain Cedar Wood: Step by Step
Let me clarify one thing, the process I am about to show you that can be used on every wood. Whether you are staining cedar wood or any other wood, the process is the same.
Step 1: Gather all the needed items
Whenever you are getting into completing a project the very first thing you should be doing is to make a plan of how exactly are you going to complete the project and what things you will be needing.
And after that, the first thing you will be doing is to gather all the needed items and order them in a way so that you can easily find them.
You will need a bunch of items when staining cedar wood, and those are:
- Sander(If the cedar wood you will be staining is small, then a manual sander will work fine. But if the wood is big then you will need a power sander so that the process will be faster and effective).
- Sandpaper (You will need two sand paper, low grit and fine grit).
- Shop Vacuum cleaner(this will be needed only if the wood you will staining is big).
- Wood Conditioner(that needs to be pre-stained).
- A brush or foam pad. Stain.
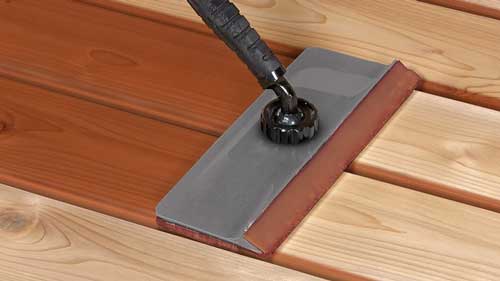
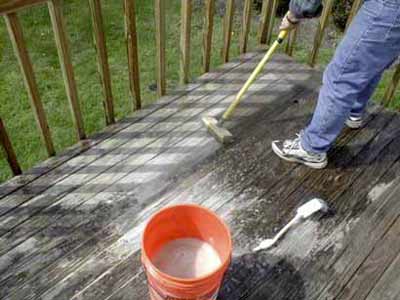
Step 2: Start Sanding the Wood
Once you have gathered all the needed items. Now choose a place that is well ventilated and if you will be staining the wood inside a room then make sure to put paper or plastic on the ground so that you will be able to gather the dust.
And then start sanding the cedarwood. As said, you will need two sandpaper, low grit, and high grit. In the beginning for a rough texture use low grit sandpaper. And make sure you sand the wood in the wood grain direction.
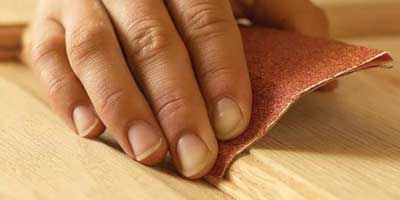
Sanding with lower grit sandpaper will give you a very rough surface and later, you will have to sand that surface with finer grit paper in order to smoothen the surface.
If you are using an electric sander, make sure to wear protective gloves because an accident can happen anytime. And if possible wear a face mask and goggles as well, so that sand dust wouldn’t go inside your mouth and eyes. If you have respiratory illness then avoid doing this.
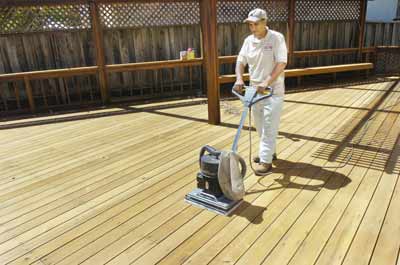
Step 3: Cleaning the Wood Thoroughly
When you are done with the sanding, you would want to get rid of the dust that sanding produced. If the wood piece is small, then wipe clean the wood. Pick a brush and work that on the sanded surface.
And do not stop unless you get a surface that doesn’t have any dust at all.
On the other hand, use the shop vacuum cleaner to suck up all the dust if the wood piece is big.
Step 4: Clean with Water
Once you have cleaned the surface, clean the wood with water. Make the wood wet. Do not even use a pressure washer on bare wood, it might clean the wood properly but it will damage the wood.
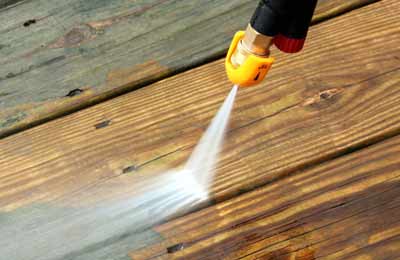
Rather you a hosepipe and the water pressure should be low.
When you get the wood wet, the grains will start to rise a little up.
Step 5: Conditioning the Wood
If you see that the wood grain has raise a little, that means that wood is not ready for staining. But before that, you will have to do the conditioning. You can use a brush to apply the conditioner.
Step 6: Apply the stain
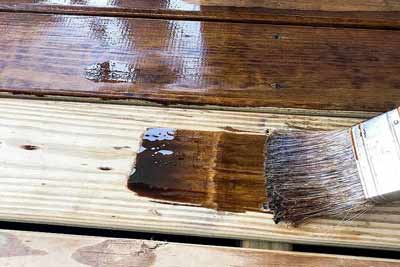
After you have applied the wood conditioner wait for 15-20 minutes before applying the stain. Ensure you are picking the right stain. There are around 6 types of wood stain, here are they!
- Wood dyes.
- Gel stain.
- Water-based stain.
- Pastel stain.
- Pigment stain.
- Oil-based stain.
Which applicator you should use with the stain that will be written over the can of the wood stain.
If you see nothing written on the packaging then use a bristle brush to apply the stain. Brush in the same direction the wood grains are directed.
How to stain wood different colors without bleeding
Step 7: Remove extra stain
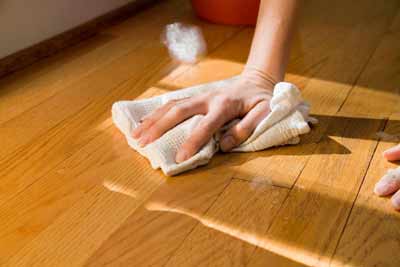
Pick the rag or foam and get rid of the extra stains. Wipe the foam or rag over the wood surface that should do all the work.
Step 8: Sealing
Once you are done with the staining, now it is time to seal that stain. But before that, you will want the stain to get dried properly. And after that seal the wood.
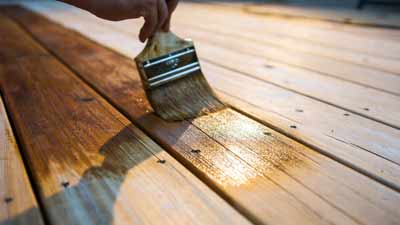
Sealing the stain will protect the wood from harsh weather such as heavy rain, UV-ray, discoloration, etc. In case you want to learn cedar wood sealing, check out our blog on how to seal a cedar wood.
Step 9: Final Touch Up
Once you have sealed the stain properly, now it is time to let that sit. Some sealer takes 24-hours to dry, some even take 45-hours, and some takes a few hours. Doesn’t matter which sealer you have picked make sure it dries properly.
Conclusion
This guide should be enough to teach anyone how to stain cedarwood. If you know anyone who has experience in sealing and staining, it would be wise to ask for a suggestion. Or you can browse YouTube videos since there are plenty of videos out there.