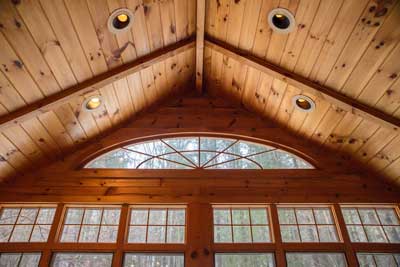
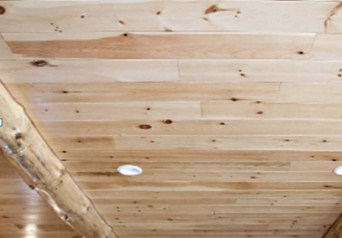
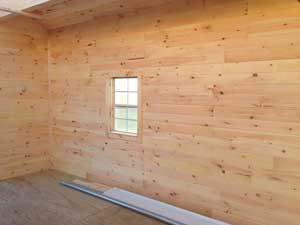
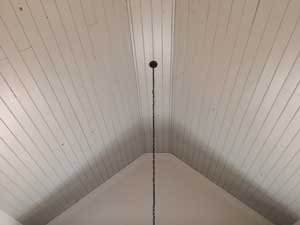
You’ve just finished installing your new tongue and groove pine ceiling, but something about it is still bothering you. The wood is beautiful, but it has no finish on it at the moment.
What are your finishing options for this type of wood? If you’re looking for a durable tongue and groove pine ceiling finish then check this best finish for tongue and groove pine ceiling.
Finishing tongue and groove wood ceiling is easy, fun, and makes the ceiling look more finished. Building custom pine ceiling can be done on your own with an inexpensive foam paint roller, paint pad, or brush.
Top 5 tongue and groove ceiling finishes comparison table:
5 Best finish for tongue and groove pine ceiling review:
#1. General Finishes Water Based Wood Stain-best stain color for pine ceiling
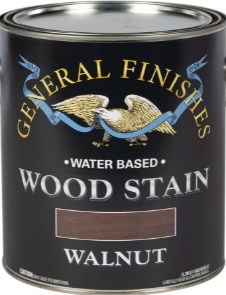
General Finishes water-based stains are great for your tongue and groove pine ceiling, providing high color saturation at low viscosity. A water-based stain will dry more quickly than an oil-base product, allowing you to move furniture back onto newly stained floors sooner after application.
General Finishes water based stains and finishes create a finish with the same depth and beauty as today’s best oil based stains, but with all the advantages of water-based products.
That means that you can Stain your ceiling just as easily as any other wood with no risk of blotchy staining or soft spots.
General Finishes STRAINED STAIN achieves the best stain consistency for staining tongue and groove pine ceilings. The interlocking grain of hardwood such as oak has a tighter radii, and this means a thicker stain is needed to bridge the gap between many neighboring pieces.
The thicker formula allows controlled penetration of the wood grain without over-penetration, which will reduce blotching on softer goods such as aspen, pine and maple.
This low-odor water based product has the same performance profile as our traditional oil based stains, at half the odor! Low VOC, water cleanup and noncombustible, it’s perfect for indoor applications, pressure treated wood decks and fencing.
Available in a variety of colors that can be particularly helpful in matching old or worn surfaces.
#2. Sunnyside Boiled Linseed Oil-best finish for pine tongue and groove
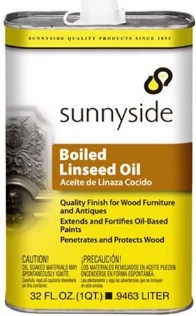
Sunnyside boiled linseed oil is the best finish for tongue and groove pine ceilings. Also known as “BLO”, it is a very popular wood finish with craftsmen because of its ease of use, ability to penetrate into all areas of wood pores creating a hard, protective film that can be tinted. It also enhances natural wood tones and grain patterns of wood.
With Sunnyside’s boiled linseed oil, you finish your project in one go. Simply brush on two coats of boiled linseed oil for a smooth, durable finish.
Boiled linseed oil vs raw linseed oil
So, what’s the difference between Linseed Oil and boiled Linseed Oil? Boiled linseed oil has a quicker drying time and more penetrating qualities. Raw linseed oil is used for outdoor applications while it is more resistant to water, while boiled linseed oil is used for indoor finishes. A good-quality boiled linseed oil will have a drying time of one to two days, while raw can take up to one month.
How many coats of boiled Linseed Oil should you use?
Start by brushing or wiping on two coats of oil/turpentine mixture, about 10 minutes apart. Each coat must be rubbed in well; excess must be wiped off.
For best results, you should apply five to twenty coats of boiled linseed oil and pure turpentine and allow two day intervals between first and second (and additional) coats. Re-check instructions for care before storing your instrument.
How often should you apply linseed oil?
Getting the right amount of linseed oil on a wood surface takes a bit of technique. We recommend first coating your surface with a a brush, roller or cloth. After 10-15 minutes, wipe off any excess oil. For an even, good looking finish we recommend 2-3 coats of oil every 12 to 24 hours.
Is Sunnyside boiled Linseed Oil toxic?
Sunnyside painting & finishing products are NON-TOXIC. Does it have any odor? Yes, most oil paints have a distinctive odour when being applied. The odour is fully explained by the chemical nature of oil paint. It is the reversion of the volatile oil to an adhesive resin, which is basically what paint really is, since it contains driers and binders added in the process to stop the process of reverting.
#3. Varathane 200261H Water-Based Polyurethane
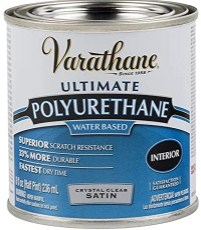
Varathane 200261H Water-Based Ultimate Polyurethane satin finish is a high quality, water-based polyurethane that provides superior protection and a beautiful satin finish to your wood projects.
It applies easily and dries quickly (Dries in 30 minutes), making it ideal for both indoor and outdoor use. This product is also VOC compliant and safe for both children and pets.
It can be used on both interior and exterior surfaces, providing an added layer of protection against grime, stains, fading or discoloration. The mix is easy to apply with a simple brush or cloth application (recoat after 2 hours).
Varathane ultimate polyurethane water based paint provides a crystal clear protective layer for interior wood surfaces. It’s water-based, so you can clean your brushes easily.
How long does it take for varathane water based polyurethane to dry?
When water-based finishes are sprayed over paints or stains, the appearance of these products may change when a water-based finish is applied. it’s best to wait one day or 24 hours before putting a poly-based finish on anything important. A good rule of thumb is 3 full days before subjecting your surface to normal use.
Is varathane ultimate polyurethane waterproof?
Yes, but you have to use it correctly. The first thing Varathane recommends is to seal the flooring surface so it will not stain if any water gets on it. You can use a sealer brush or roller, then allow the product to dry according to the instructions on the package.
Then apply two coats of Varathane Ultimate Polyurethane as a finish coat, allowing each coat to dry from 12-24 hours between applications.
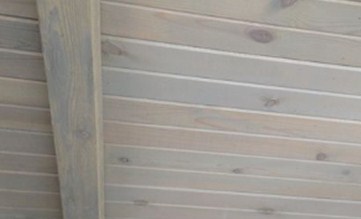
#4. Minwax White Wash Transparent Layering Color
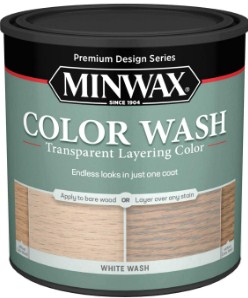
Minwax is a water-based formula that will add an aged look to bare or stained wood. This transparent layering color can be applied over oil or water-based stain to darken the existing wood tone. A synthetic or foam brush, stain pad or rag are recommended when applying this product when using for staining.
Minwax Transparent Layering Color is a unique water-based colorant that can be used to add a tint, shade or highlight to wood surfaces. Its unique formula makes the product easy to apply and quick drying. What’s more, it can easily be removed after application, if needed.
Ideal for bare or already stained wood. Dries in 1 hour. Endless coats in just one coat! This water-based formula cleans up with soap and water.
The water-based formula allows you to apply and remove as many coats as you like in just one application, and the results are stunning! Available in whitewash or brown shades.
Features & Benefits:
- The unique formula makes it easy to apply and quick drying.
- Can easily be removed after application, if needed
- Adds a second color for highlights or lowlights
- Water based formula easy to use and clean
#5. HOPE’S Pure Tung Oil, Natural Waterproof Wood Finish and Sealer
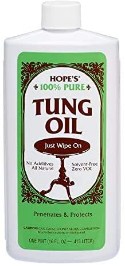
HOPE’S Pure Tung Oil is a natural wood finish and sealer that provides protection against water, weathering, and UV rays. It is non-toxic, eco-friendly, and easy to apply.
HOPE’S Oil can be used on indoor and outdoor wood surfaces such as decks, fences, siding, and roofs. It dries quickly to a hard, durable finish that does not require a top coat.
HOPE’S Tung Oil is an excellent choice for finishing and sealing wood. The oil is processed with heat and pressure to remove impurities without the use of solvents, making it eco-friendly.
On top of that, this oil has very low volatile organic contents (VOC) in both in its natural state and when dried.
This oil is derived from the tung tree and is known for its durability and resistance to water. It can be used on all types of wood, both indoors and outdoors, to seal and protect it from the elements. Plus, it gives your wood a beautiful, natural finish that will last for years.
HOPE’S Oil is also a great choice if you’re looking for a waterproof sealant. It will keep your wood from absorbing moisture, which will prevent warping and cracking.
This oil won’t ever yellow or change the color of your wood like other sealants can. And because it’s made with natural ingredients, this tung oil is non-toxic so you’ll never have to worry about breathing in harmful chemicals or exposing anyone you love to them.
What is Tongue and Groove Pine?
Tongue and groove (also: tongue-and-groove) is a method of fitting similar objects together, edge to edge, used mainly with wood. A ‘groove’ is cut into the edge of one board, into which another board or boards are joined so as to fit snugly.
This joint is highly valued for its strength and resistance to separation through humidity changes.
A raised ‘tongue’, formed along the edges of two boards to be joined, fits into a groove cut in the other board.
When they are brought together this forms a joint much like a mortise and tenon joint but without the need for skilled workmanship (the tongue and groove may simply be cut using powered machinery).
Most commonly tongue is on the edge of a board that is wider than the groove, but it can also be on a board that is narrower than the groove.
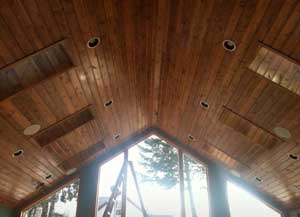
Tongue and groove boards are usually used as flooring, wall panelling, or ceiling cladding. Finishing tongue and groove pine walls using stain are very effective.
The effect of using tongue and groove boards is to make a very strong joint with a good appearance. The tongue and groove joint was first patented in the United States in 1814 by Asa Hovey.
Pine is a common softwood that comes from coniferous trees. It has a straight grain and is moderately strong.
Pine is often used for construction because it is inexpensive and easy to work with Pine is also available in different grades, with lower grades more suited to construction purposes and higher grades more suited as furniture.
Tongue and groove board are used because of its strength against warping due to humidity changes since tongue and groove boards are fitted together tightly without gaps.
Stain tongue and groove ceiling before or after installation guide
This guide tells where to put stain on tongue & groove ceiling, how much stain should be applied, when after installation do I apply the stain etc. It also briefly mentions some important steps such as stirring the stain well, applying evenly across the surface etc.
When staining a tongue and groove ceiling, there are a few things you need to keep in mind. First, it is best to do the staining before the installation of the ceiling.
This will allow you to get an even stain application. Second, make sure that the surface is clean and free of any dust or debris. Once you have completed these steps, you are ready to begin staining your tongue and groove ceiling.
To start, stir the stain well and then apply it to the surface with a brush or roller. Be sure to apply it in even strokes, making sure not to missed any areas.
Allow the stain to dry completely before installing the ceiling. This typically takes around four hours. If you are using a water-based stain, be sure to follow the manufacturer’s instructions for drying time.
Once the stain is dry, you can install the ceiling. Be sure to follow the installation instructions carefully to ensure a proper fit. If you have any questions, be sure to consult with a professional before proceeding.
If you are looking for an easy way to stain your tongue and groove ceiling, consider using a pre-made stain. These stains are designed to be easy to use and come in a variety of colors. They are also non-toxic, so you don’t have to worry about any harmful fumes.
Now you are ready to stain your tongue and groove ceiling!
Follow these simple steps for a beautiful, professional finish:
1. Stir the stain well and then apply it to the surface with a brush or roller.
2. Apply it in even strokes, making sure not to missed any areas.
3. Allow the stain to dry completely before installing the ceiling. This typically takes around four hours.
4. If you are using a water-based stain, be sure to follow the manufacturer’s instructions for drying time.
5. Once the stain is dry, you can install the ceiling. Be sure to follow the installation instructions carefully to ensure a proper fit.
6. If you have any questions, be sure to consult with a professional before proceeding.
Pre-made stains are available in a variety of colors and types including:
- Oil-based – oil based stains are water resistant and provide long lasting color. They are great for exterior woodworking projects.
- Latex – latex based stains provide a light sheen and can be used on interior as well as exterior projects. They work best as an all-purpose stain that will look good on almost any type of wood.
- Acrylic – acrylic stains offer deep, rich color and can be wiped or rolled onto the surface. These stains feature excellent penetration properties and work well on both interior and exterior surfaces.
When using pre-made stain to achieve results, always read the manufacturer’s instruction guide first before proceeding with your project. This is to ensure you are using the product in the correct manner and to avoid any potential damage.
How to finish tongue and groove pine ceiling
Do you need to finish pine tongue and groove ceiling?
When installing a pine tongue and groove ceiling, one of the final steps is to finish it off. This means that you will need to seal the seams between the boards to prevent moisture from entering the wood and causing damage.
One way to finish a pine tongue and groove ceiling is to use a paint or sealant. You can either brush or spray the sealant onto the boards, or you can pour it on and then spread it with a paintbrush.
Make sure to get into all of the cracks and crevices, and allow the sealant to dry completely before painting or staining the ceiling.
Another option is to use a vinyl sealant. This type of sealant is applied with a caulking gun, and it forms a waterproof barrier between the boards.
It is important to note that vinyl sealant should not be used in areas that will be exposed to direct sunlight, as it can cause the vinyl to melt.
If you are using tongue and groove panels instead of boards, you can use panel adhesive to help finish the ceiling. This adhesive is applied with a brush or foam roller, and it dries clear so that it will not show up on the finished ceiling.
No matter which method you choose, it is important to finish the pine tongue and groove ceiling as soon as possible after installation. This will help protect the wood from moisture and prevent any damage from occurring.
What tools you need to Finish a Tongue & Groove Ceiling
- Tongue & Groove Ceiling Panels
- Circular saw
- Plywood
- Ruler or Tape Measure
- Chalk Line
- Stapler
- Paint or Stain
- Paint Brush or Roller
- Ladder
How to finish tongue and groove ceiling?
Once you have installed the tongue and groove boards, you will need to finish the ceiling. There are a few different ways to do this:
Paint: This is the simplest way to finish a tongue and groove ceiling. You can use any type of paint, but a semi-gloss or high-gloss paint will be the most reflective.
Stain: If you want to add some color to your ceiling, you can stain it with a wood stain. Be sure to test the stain on a piece of scrap wood first to make sure you like the color.
Shellac: Another option for finishing a tongue and groove ceiling is shellac. It gives the ceiling a glossy look and helps protect it from water and moisture.
Contact cement: Contact cement is a good option for finishing a tongue and groove ceiling if you want it to be waterproof. It’s also very durable and will withstand wear and tear.
No matter which method you choose, be sure to follow the manufacturer’s instructions closely. And always test any finishes on a small section of the ceiling first to make sure you like the results.
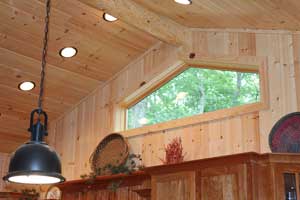
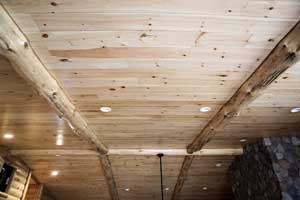
How do you seal a knotty pine ceiling?
When it comes to sealing knotty pine ceilings, several factors impact the process.
Sealing a knotty pine ceiling is a process that helps to protect the wood from damage and keep it looking new for longer. There are a few things you will need to do in order to seal your ceiling properly:
– First, vacuum or dust the surface of the ceiling to remove any debris or dirt.
– Sanding the wood: This is an important part of the process and should not be skipped no matter what type of ceiling you have. Sanding will remove any loose pieces of wood, dirt and splinters from the surface of the wood to ensure a cleaner final product.
– Next, use a primer to help the sealant stick to the wood better. A latex primer is best finish for knotty pine ceiling.
– Finally, apply a coat of sealant to the entire surface of the ceiling. Be sure to get into all of the cracks and crevices, as well as around any knots or other features on the wood.
Stain will help protect it from moisture damage as well as damaging UV rays from sunlight. Using a brush, apply multiple thin coats of varnish evenly across the surface of your ceiling.
If using stains instead, use clean rag and rub them on according to directions on package for best results. You should wait several days before applying any other chemical treatments to allow for drying time.
Which way should tongue and groove ceiling be installed?
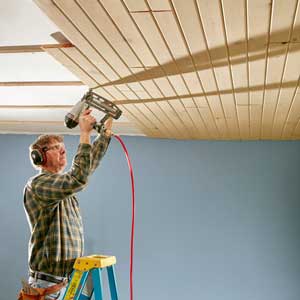
When installing tongue and groove ceiling boards, you should apply a bead of wood glue onto the grooves before inserting them into each other.
It is also important to make sure that you align the tongues along the length of a plank to a pencil line or mark painted on a joist or support beam. These guidelines will ensure that your seams are straight when you’re done.
Lastly, when installing tongue and groove boards that are more than 1/2″ thick, it’s important to use nails that are longer than the width of the board in order to completely penetrate through both tongues at once. This will help keep your ceiling strong for decades to come.
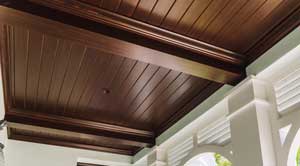
How do you keep pine tongue and grooves from turning yellow?
There are a few ways to help keep your pine tongue and groove from turning yellow. One is to make sure that you seal the wood properly with a good quality sealant.
- If you are looking for an easy way to keep your pine tongue and groove looking great, try using a polyurethane sealant. This will help protect the wood from moisture and staining, and it will also help to keep it looking shiny and new. Be sure to apply the sealant in a well-ventilated area, and follow the instructions carefully.
2. Another way to protect your pine tongue and groove is to paint or stain it as soon as possible after installation. This will help to seal the wood and keep it looking beautiful for many years. It is also a good idea to use a semi-transparent stain or paint, as this will allow the natural beauty of the wood to show through.
3. Another is to make sure that you paint or stain the wood as soon as possible after installation.
4. Finally, you can also use a UV-resistant coating on the wood to help protect it from the sun’s damaging rays. By following one or more of these tips, you can help keep your tongue and groove looking beautiful for many years to come.
Do you need to stain both sides of tongue and groove?
When working with tongue and groove boards, it is often necessary to stain or seal the edges of the boards in order to protect them from moisture and decay. It is important to stain or seal both sides of the joint in order to ensure that the entire surface is protected.
If you only stain or seal one side of the joint, moisture can seep in through the unsealed side and cause damage to the wood.
If you are using a water-based stain or sealant, it is usually enough to apply it just to the edge of the board. However, if you are using an oil-based product, you will need to apply it to both sides of the joint in order for it to be effective. Make sure to allow the product to dry completely before using the boards.
Best finish for tongue and groove pine ceiling Buying guide
There are many different finishes that can be used on a tongue and groove pine ceiling. The best finish for your particular situation will depend on the look you are trying to achieve, the level of durability you need, and how much work you want to do yourself. Here are some of the most popular finishes for tongue and groove ceilings:
Paint
Paint is a versatile finish that can be used on any type of ceiling. It is easy to apply, and it can be customized to create any look you want. However, paint is not very durable, so it may not be suitable for high traffic areas.
Varnish
Varnish is a durable finish that can withstand wear and tear better than paint. It is also easy to apply, and it can be customized to create any look you want. However, varnish is not as easy to customize as paint, and it can be a little more difficult to apply.
Stain
Stain is a popular finish for tongue and groove ceilings because it allows the natural beauty of the wood to shine through. It is also durable and easy to apply.
However, stain does not offer as much customization as paint or varnish, and it can be difficult to remove once it is applied.
Conclusion
Finishes with waterborne technology are the absolute best choice for interior wood products, whether raw wood or paint grade.
Finishes with waterborne technologies are safer for you and better for the environment. I hope best finish for tongue and groove pine ceiling would help you to sealing tongue and groove ceiling.
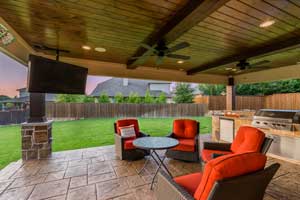
You go into a house that looks great from the street, but once inside it’s a disappointment. Why is that?
Well, it could be many things from ceilings that are stained the wrong color to floors warped from moisture to a combination of both. So my question is a general one: What Are The Worst Things You Encounter In A Home Viewing?