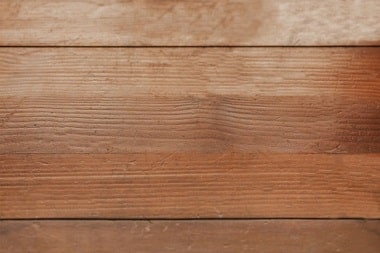
Staining wood is a great way to personalize your home and add a unique touch. However, not all woods are appropriate for staining; some may bleed. Follow these simple steps, and you will be able to stain your wood the way you want it.
To stain wood with different colors without bleeding, first, pre-soak the wood in water for at least 30 minutes.
Subsequently, add the desired colorant to a sprayer and mist it onto the wet surface. Let the paint dry before finishing up by sealing with an appropriate sealant.
Decorative Wood Staining Techniques
Electrical Staining
Stain wood by lighting a low wattage bulb over the wood. In most cases, this process will stain only the grain of the material, leaving it looking especially rustic and weathered.
If you want to take your stained finish even further, add in some texture or texture boxwood on larger surfaces. For long-lasting beauty against concrete or cement boards, use any type of paste wax such as carnauba.
Paint & Lacquer Stain
For a high-impact, long-lasting finish, you can use either spray or brush lacquer and any kind of paint. For an opaque finish, use a thick consistency paint, while for a lighter effect or sheer coverage, use thinner paints.
When spraying lacquer, be sure to work from the top down so that dripping areas will not get too wet and cause run-outs on adjoining pieces of wood.
Oil Staining
Stain wood by applying oil such as linseed or Tung oil directly to the surface. For a more intricate look, you can use a brush to apply different colors of oils in varying concentrations. Be sure to seal your finish with an appropriate sealant after completing the stain job!
When it comes to wood finishing, there are many ways to make your project look great! Whichever method you choose, be sure to take care during the staining process so that your finished product is accurately and satisfactorily stained.
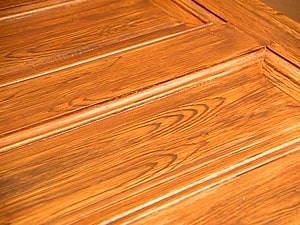
How To Two-tone Stain Wood
There are many ways to two-tone stain wood. One popular way is to use a light color of the stain on the top of your project and a darker color on the bottom.
You can also choose to use two different colors of stains, or you can use one color and add highlights with a lighter shade. It’s important to test out different techniques so that you get the results that you want.
There are many different types of stains available, so be sure to choose one that will complement the colors of your project.
Once you have selected a stain, apply it using a brush or an applicator bottle. Be sure to evenly coat the surface and allow it to dry before completing your finishing process.
What is Wood Stain Bleeding
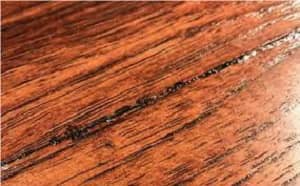
Bleeding is an unfortunate outcome of applying stains to the wood. When the stain reaches the porous parts of the wood, it starts to seep out, and that’s when bleeding occurs. You can minimize this problem by using a high-quality Stain and Sealer or by double coating your project with a topcoat.
If bleeding is still a problem, you can try using a different type of stain or by applying the stain in smaller sections.
How To Prevent The Wood Stain From Bleeding Under The Tape
One of the most common mistakes made when staining wood is applying too much stain. When the stain hits the porous parts of the wood, it starts to seep out, and that’s when bleeding occurs. To prevent this from happening, use a high-quality Stain and Sealer or double coating your project with a topcoat.
Additionally, make sure to tape off any areas that you don’t want to be stained before beginning your project. Tape is used to protect the wood during the finishing process.
It’s important that you use tape when staining your project, as any spills will have major negative effects on its value and appearance. It also means not all of your stains work well with each other, so be sure to test them out for a variety of possibilities.
The types of tape available include carpentry, masking, and masking adhesives, among others. Each type of tape has its own advantages and disadvantages, so it’s important to choose the one that will work best for your project.
How To Stain A Design On Wood
One of the most popular ways to personalize a piece of furniture is by staining it. If you want to stain a design on wood, follow these steps:
1) First, prepare your wood surface by sanding it down to its bare minimum if needed. This will allow the dye to stick more easily.
2) then mix your stain with water according to the manufacturer’s instructions. Make sure that you stir the mixture well before applying it to the wood.
3) Apply a light coat of stain to the desired area and allow it to dry for at least 30 minutes.
4) Once the stain has dried, use a painter’s brush or a rag to apply paint over the top of it. Use small, circular strokes in order not to spread too much paint all over your project.
5) Finally, seal your work by reapplying any necessary coats of sealant.
What Type To Use With Stain
When staining wood, it’s important to use the correct type of tape. There are a number of different types of tape available. But three that are particularly useful for staining wood include carpeting tapes, masking tapes, and adhesive spray-on tapes.
- Carpeting tapes come in rolls and can be easily cut to the desired size. They’re perfect for covering large areas quickly and without messes.
- Masking tapes are made of a sticky adhesive and are perfect for covering small areas. They’re also available in various widths, ensuring that you get the coverage you need.
- Adhesive spray-on tapes come in a variety of different flavors and can be used to apply paint or stains easily and without any messes.
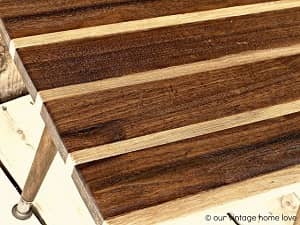
How To Stain A Wood Pattern
When staining a wood pattern, it’s important to make sure that the pattern is completely covered with a stain. If some of the design is showing through, it will look uneven and won’t look as though it has been carefully applied.
To stain a wood pattern, follow these steps:
1) Start by mixing the desired color of stain with water according to the manufacturer’s instructions. Make sure that you stir the mixture well before applying it to the wood.
2) Carefully apply the stain to the areas of the pattern that you want to color. Make sure to avoid getting any of it on the surrounding wood.
3) Allow the stain to dry for at least 30 minutes before applying a coat of sealant over it.
4) Once everything has dried, use a painter’s brush or rag to carefully add additional coats of paint if desired.
Check How to Stain Cedar Wood.
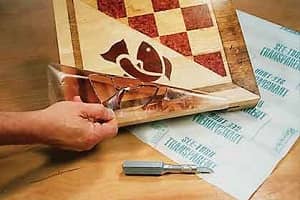
How To Stencil Stain On Wood Without Bleeding
Once you have chosen the type of stain and pattern that you would like to use, it is time to begin preparing your wood. To stencil, a stain without bleeding, first, choose a piece of artwork or any other image that will serve as your guide.
You will also need some masking tape and painter’s tape. Once all of your supplies are assembled, take the stencil and position it so that the design is centered on the wood.
Make sure that the stencil has completely adhered to the wood and press down firmly so that it will transfer evenly onto the surface.
Now, start painting in accordance with your design. If you are using a brush, use short strokes and work quickly so that the paint doesn’t dry on the stencil and create bleeding errors.
If you are using a sprayer or roller, be careful not to saturate any part of the stencil. Instead, use a misting mode to evenly cover the area with paint.
Frequently Asking Question
How To Stain Wood Without Bleaching?
There is no one-size-fits-all answer to this question, as the best way to Stain wood without bleaching will vary depending on the type of stain that you are using and the condition of your wood.
However, some popular tips for Staining Wood without Bleaching include mixing a bleach solution with water before applying the stain or using a pre-stain treatment like Johnson’s Polyurethane Pre-Stain.
How To Paint And Stain Wood Furniture?
For wood furniture, it is important to make sure that the paint and stain are applied evenly. In addition, be sure to use a primer before painting your furniture.
Additionally, remember to use short strokes when applying the paint so that you avoid dripping or spills on your furniture. Finally, be careful not to get the paint on any of the furniture’s surfaces, as this can damage it.
How To Stain With Two Colors On The Same Woodwork?
If you are stained with two colors on the same woodwork, it is important to make sure that the colors are blended evenly. This can be done by brush application or by using a sprayer or roller. Additionally, remember to wait until the paint is completely dry before polishing your furniture.
How Do You Apply Wood Stain Colors?
When applying wood stain colors, it is important to use a small brush or applicator. Additionally, be sure to apply the paint in short strokes and avoid getting any of the paint on the furniture’s surfaces. Finally, allow the finished product to dry before polishing your furniture.
How Do You Stain Wood With Multiple Colors?
When staining wood with multiple colors, it is important to make sure that the colors are blended evenly. This can be done by brush application or by using a sprayer or roller. Additionally, remember to wait until the paint is completely dry before polishing your furniture.
How Do You Stop A Wood Stain From Bleeding?
If you are using a wood stain that contains water-based chemicals, it is important to make sure that the furniture is sealed after staining. This can be done by applying a coat of varnish or wax before letting the furniture dry completely. Additionally, it is helpful to put newspapers under the furniture while it dries in order to absorb any excess liquid from the wood stain.
Can You Layer Different Colors Of Stain?
Yes, you can layer different colors of stain on the same piece of wood. However, be sure to use a latex-based wood stain because these types of stains will not penetrate the wooden surface. Additionally, it is important to wait until the paint is completely dry before polishing your furniture.
Conclusion
It is not tough to stain wood in different colors without bleeding. But there are a few important things to remember when staining- painting your furniture. First, be sure to use a small brush or applicator and apply the paint in short strokes.
Second, allow the finished product to dry before polishing your furniture. Finally, make sure that the colors are blended evenly by either brush application or sprayer/roller application.
